
Synology Let’s Encrypt Certificate: A Guide to Setting Up Free SSL Certificates (with Port Forwarding Instructions)
Synology DiskStation Manager (DSM) offers robust features for network and server management, including secure web access through SSL certificates. Proper port forwarding is essential to ensure that your DSM is accessible over the internet using ports 80 (HTTP) and 443 (HTTPS). This guide, adapted from a solution by serenity404, outlines the steps to install, configure, and manage SSL certificates on your Synology DiskStation, including port forwarding setup.
Step-by-Step Guide
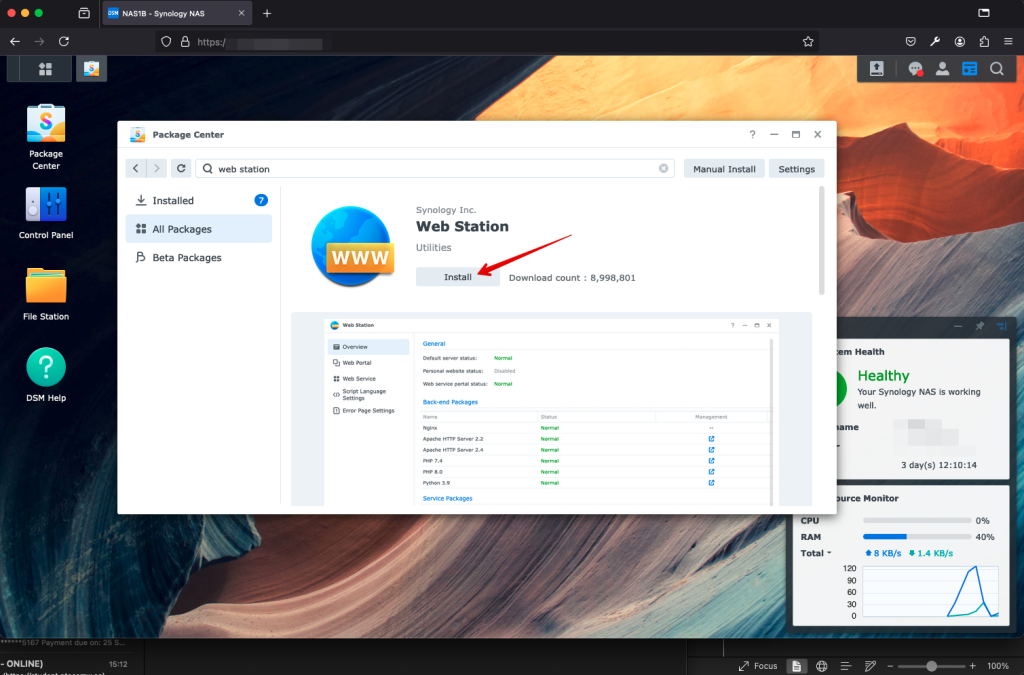
1. Install and Configure “Web Station”
You will need to install the Web Station package from the Package Centre, even if you don’t plan to host a website right away. This allows you to make your DiskStation web-ready for the SSL certificate.
2. Port Forwarding Setup for Ports 80 and 443
For your Synology DiskStation to be accessible externally, you will need to configure port forwarding on your router for ports 80 (HTTP) and 443 (HTTPS).
- Access Your Router’s Admin Page:
- Open a web browser and enter your router’s IP address
(commonly 192.168.0.1 or 192.168.1.1). - Log in using your administrator credentials.
- Open a web browser and enter your router’s IP address
- Locate the Port Forwarding Section:
- In your router’s settings, navigate to “Port Forwarding”. This may be located under Settings / Security / Port Forwarding.
- Add a New Rule for Port 80:
- Name: Enter a name for this rule (e.g., “Synology HTTPS”).
- Forward Rule: Tick this option
- Destination IP: This is automatically filled in
- From: Any
- External Port: Set to 80.
- Forward IP: Once again, input your Synology NAS’s internal IP.
- Internal Port: Set to 80.
- Protocol: Select TCP.
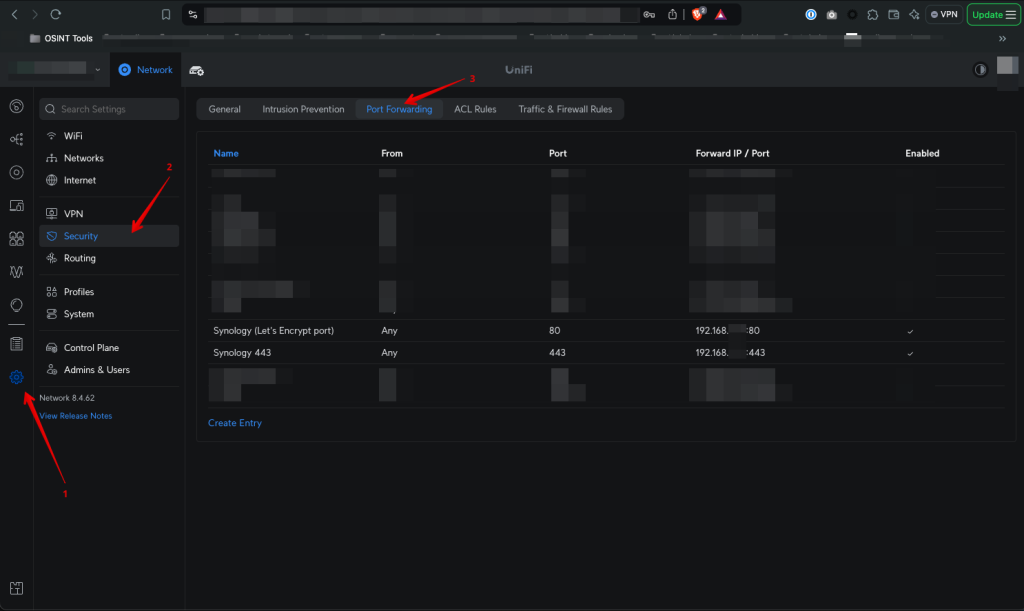
4. Add a New Rule for Port 443:
- Name: Enter a name for this rule (e.g., “Synology HTTPS”).
- Forward Rule: Tick this option
- Destination IP: This is automatically filled in
- From: Any
- External Port: Set to 443.
- Forward IP: Once again, input your Synology NAS’s internal IP.
- Internal Port: Set to 443.
- Protocol: Select TCP.
5. Save the Changes:
- After entering the rules for ports 80 and 443, save the changes and, if necessary, restart your router to apply the settings.
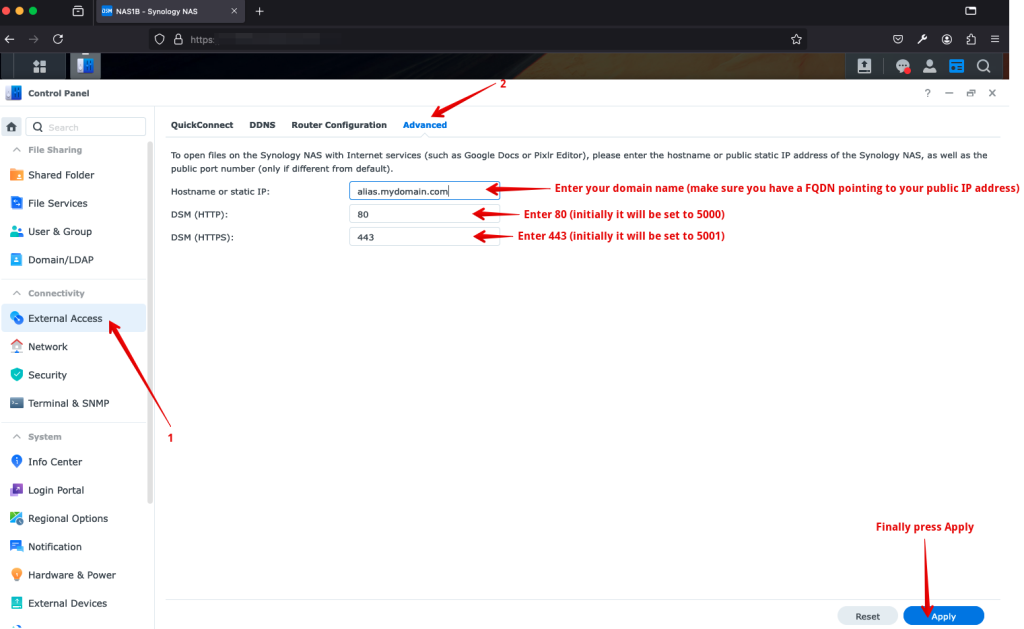
3. Configure External Access in DSM
Next, configure your external access settings to ensure your Synology DiskStation can be accessed from the internet.
- Navigate to
Control Panel -> External Access -> Advanced. - Set your External DSM Host to your DNS address
(for example, alias.mydomain.com)and ensure that ports 80 and 443 are correctly configured.
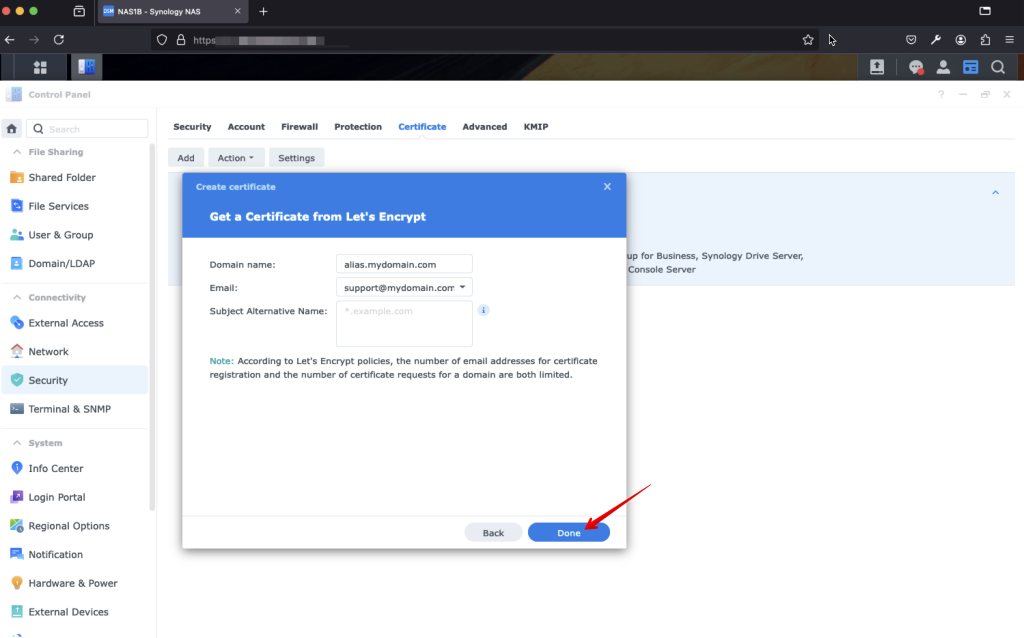
4. Generate a New SSL Certificate
Now you are ready to generate an SSL certificate using Let’s Encrypt (LE). This will secure your connection.
- Navigate to
Control Panel -> Security -> Certificate. - Click on “Add” and select Add a New Certificate.
- Choose Get a certificate from Let’s Encrypt.
- Enter your DNS Hostname
(e.g., alias.yourdomain.com), an email address, and leave the Alternate Name field blank. - Click Apply.
5. Revert or Reconfigure (if applicable)
If you made any temporary adjustments to ports or firewall settings, you can now revert those changes or reconfigure them as necessary.
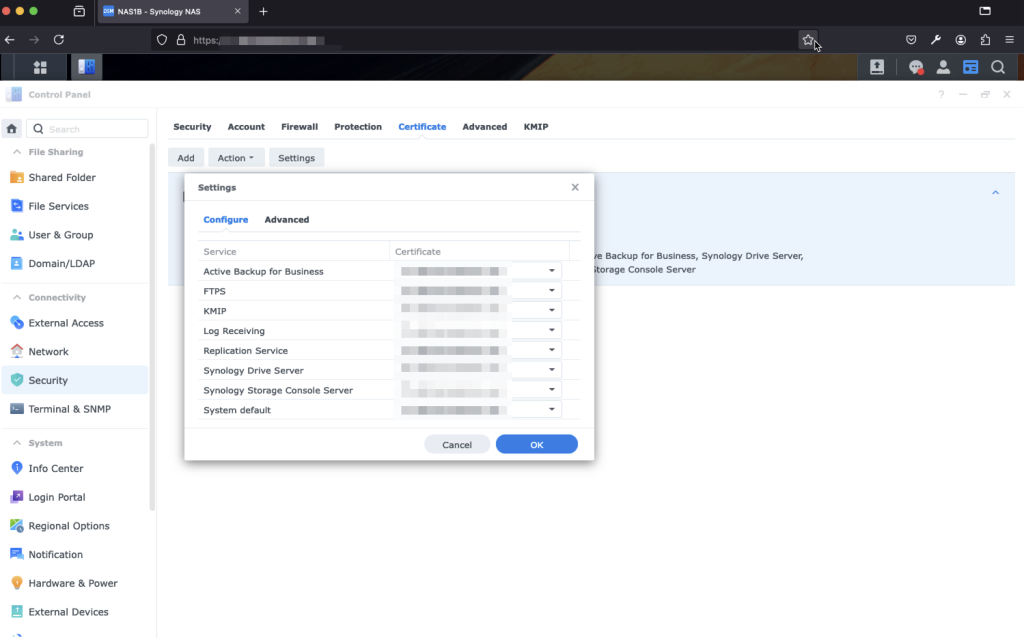
6. Configure the Usage of Your New Certificate
After issuing the certificate, you need to configure DSM services to use the new SSL certificate.
- Go to
Control Panel -> Security -> Certificates -> Settings -> Configure. - Select the new certificate for the relevant services such as HTTPS for the DSM web interface.
7. Regular Certificate Renewal
Let’s Encrypt SSL certificates are valid for 90 days, so you’ll need to renew the certificate every three months. Synology can automate this process, but it’s good practice to check regularly to ensure renewal happens smoothly. If you followed step 5, ensure that you repeat steps 1, 2, and 3 before the certificate expires to avoid any interruptions.
By properly configuring port forwarding and managing your SSL certificates, you can ensure that your Synology DiskStation remains secure and accessible over the internet. Following these steps will enable you to confidently manage your SSL certificates and secure connections.
Disclaimer: I am a qualified Unifi Networking Equipment Installer.
